Strengths and Weaknesses
Strengths:
+ A lategame scaler that offers some of the best in class when it comes to consistent single target DPS.
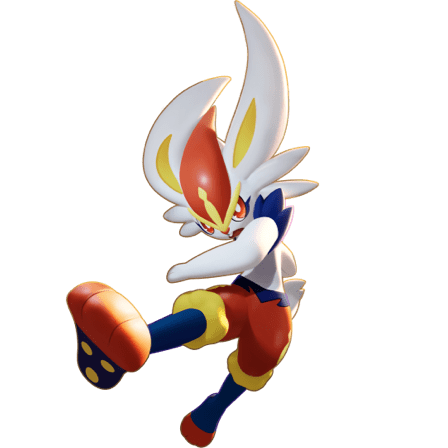
+ Great toolset for mobility and outplaying divers, especially with Blaze Kick . Cinderace on its good set is unmatched when it comes to repositioning ability among attackers.
+ Unite Move ![]() offers one of the highest secure ranges on objectives in the game. When paired with Cinderace having great objective ripping speed, this character has a very solid rip and flip angle if you hold onto your Unite.
offers one of the highest secure ranges on objectives in the game. When paired with Cinderace having great objective ripping speed, this character has a very solid rip and flip angle if you hold onto your Unite.
+ If Pyro Ball  , still has pretty good burst damage potential.
Weaknesses:
– Squishy.
– Very weak earlygame that locks it to jungle and vulnerable to falling behind early on.
– Outside of Pyro Ball (which is a much worse move) and Unite move, Cinderace has nothing to offer for damaging more than one person at a time since it’s wholly dependent on auto attacks for damage output.
Build + Gameplay
Best Items for Cinderace – Held Items and Battle Items
Builds are roughly the same for both movesets so these are the best items for Cinderace
Held Items: Muscle Band  , Scope Lens
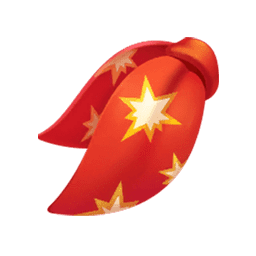
  , Rapid Fire Scarf
 ![]()
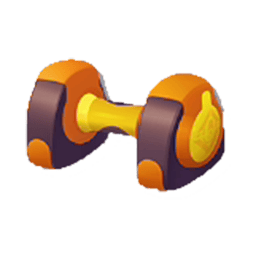
– Muscle band  is core on ADC Pokemon due to the bonus % remaining HP damage and extra attack speed.
– Cinderace has a high critical-hit rate with a lot of autos, making Scope Lens  a good boost to help Cinderace maximize damage output.
– Rapid Fire Scarf  lets you pump out even more autos and proc Blaze passive often and heavy, especially after lvl 11 with BlazeKick+’s atkspeed buff.
– If you’re using Pyro Ball ![]() , Attack Weight
, Attack Weight  can possibly be used in place of Rapid Fire Scarf to utilize the insane scaling of Pyro Ball. Getting stacks as Cinderace is hard though, so I’m not sure if its something I’d recommend. The payoff is good if you’re somehow able to safely get your stacks though, both for your Pyro Ball
  and for your general auto attack output.
Battle Item: Eject Button 
– Eject Button  is the best all around pick for Cinderace. Having another repositioning tool lets you make even more outplays and be able to go through walls that you wouldn’t be able to with just Flame Charge.
– If you don’t want Eject Button though, Full Heal  and X-Attack
  are also viable options. Full Heal
  is handy for avoiding any potential CC that you may not be able to easily avoid and it can be a gamechanger into matchups that have sure hit grab ults like Tsareena, but generally Eject Button
  should be getting you out of situations where you’ll even need Full Heal to begin with. X-Attack
  is more of an ego pick that Cinderace gets good mileage off, but needs you to be playing very well to make up for losing a lot of safety.
Emblems: 6 Brown  6 White
  – Flat Atk Focus
Red emblems aren’t a good boost emblem loadout on Cinderace due to the way attack speed thresholds work on this game, so focus on brown emblems for maximum damage.
How to Play Cinderace in Pokemon Unite
Press A until you break your controller  . Overall, you want to just stay behind your frontliners and get off as many autos as you can while keeping people at the edge of your range. Your skills should be saved mainly for the right moment to escape danger, rather than be leaned on as a constant source of damage. Cinderace is overall a test of your positioning game, identifying where you can maximize damage to opposing Pokemon and leaving before it gets too spicy or they can close the gap.
Regardless of which build you play, farming hard is also very important. The nature of ADCs in general (but especially Cinderace) makes it so that it really wants to be ahead to be getting good output. Try to make it your goal to be level 13 by the 2 minute mark so you can scale Cinderace into a late-game damage machine. If it’s not a low EXP game, even level 14 can be very easily attainable if you’re good about farming.
About Blaze  :
:
There’s the short buff to auto attack speed and critical hit rate that you get upon getting to half HP or less, but that’s not too important. The other aspect to this passive is a big part of its high DPS, which is the cinder stacking mechanic.
Cinderace will apply cinder charges whenever they deal damage. Basically, unboosted autos place down one cinder on the target. Hitting boosted attacks or one of your skills (which also gives you another boosted auto upon casting) applies two cinders. When the fifth cinder is applied, they get consumed to deal a burst of extra damage.
While you can get still very satisfactory output without even knowing this passive exists, you can really squeeze out a noticeable amount of extra numbers with this character if you do start optimizing your moves for it. While it’s not too often applicable during the lategame due to you often needing to hold onto your mobility tools for when you need them, it can definitely make a huge difference for your earlygame.
You ideally want to be activating the bonus damage of Blaze with a boosted auto. A typical early game combo for clearing wild Pokemon in the jungle is auto > auto > boosted auto > Ember > boosted auto. Before you become a Cinderace, boosted auto  > Ember
  > boosted auto
  sequence is pretty good to have in mind in general, as that alone can deal a deceptive amount of burst damage to someone trying to fight you. Since your skills also give you a boosted auto upon casting, be sure cast them after sending out a boosted auto that you already have if you’re trying to maximize damage output.
Being able to recognize that you’re able to activate Blaze’s bonus damage is also a helpful skill to have. When the fire icon has 2 or 3 parts filled up, that’s when hitting a boosted auto or skill can activate the bonus damage. This can be very clutch for finishing fights quicker with an extra burst of damage or even securing an objective in a pinch. If you want to get the most out of Cinderace, focus on keeping track of your blaze counters when dealing damage to opposing pokemon.
Deciding between Flame Charge or Feint  :
:
Feint is.. not very good. It is a pretty easy to use dodge against some difficult to avoid things, sure hits and the invisibility frames also makes Cinderace immune to hindrances, but Flame Charge  being a dash just gives it a lot of inherent value and playmaking that outclasses Feint’s invincibility frames. Why Feint
  when you can just get good and dodge or stay out of range entirely with Flame Charge
  instead?
If you REALLY want to play this move though, run it with Blaze Kick  so you have at least some repositioning power.
Cinderace’s Unite Move – Blazing Bicycle Kick
The hardest part about using this move is getting past the wonky sure hit aiming. Be sure to make sure your target is highlighted by the reticle before releasing it to make sure it lands. If big precision isn’t necessary, auto aiming is a fine option just to make sure you get it off quickly, but you shouldn’t risk auto aiming if you’re trying to secure an objective.
This move’s base damage is decent for chunking grouped up enemies but nothing to write home about. The real value comes in with its large 14% missing HP damage bonus that isn’t capped, making it a very strong tool for securing objectives and finishing off weakened opponents with a (usually) long range sure hit. Cinderace’s unite buff also comes with a nice 30% movement speed, 35% attack speed, and 20% max HP shield, which is also pretty powerful to have on hand for general fighting as an ADC.
Since the buffs, its cooldown has been significantly reduced and it also has unstoppable in its duration. You can also throw this out for avoiding something like a Tsareena ult or to power through some CC that you can’t dodge. Because of how much Cinderace should be farming, you no longer have to be afraid of just throwing this ult out to win midgame skirmishes and get nice EXP off it.
During a big objective fight you want to usually hold onto your Unite move so you can have it in the back in case things come down to a flip. However, don’t be afraid to just let it rip if you’re confident that it can change the tide of a fight by keeping you alive or securing some big kills.
Moveset 1 - Best
Blaze Kick + Flame Charge / Feint
This set combines two of Cinderace’s best mobility and self peel tools to combine into a package that lets Cinderace have a high amount of outplay potential and safety to pump out as many autos as possible. Note how I said that these are self peel and mobility tools. This means that you should generally be saving your Flame Charge  and Blaze Kick
  for when you actually need them, instead of using them for more damage. Positioning is key as this character, so naturally the moveset that emphasizes that is the strong set.
Flame Charge  is a standard dash and should be used for general purpose repositioning. Take advantage of the walls that you can dash through! It’s also good to note that using Flame Charge+ will cause the next boosted attack to slow the movement speed of opposing Pokemon for a short time (30% reduction for 2 seconds), which can help you to kite melee Pokemon who have gotten too close to Cinderace or escape tricky situations.
The damage on Flame Charge  is very minimal, so it should almost never be used as a tool for damage. The only time where this valid to do is when you’re in the middle of being dove and the fight is calling for you to be able to quickly burst down the enemy diver with a safe kite away or escape not being an option. Since Flame Charge
  still puts 2 cinder stacks onto people it hits, this can be very handy for squeezing out that clutch Blaze
  proc to win you a do or die close quarters fight.
A very common mistake people make with this character is that they use Blaze Kick  once getting the plus version just for the bonus attack speed, which then puts them into an unsafe position when they were already in a safe position to begin with. Especially since Blaze Kick itself also does little damage, it should instead be used as a reactionary tool to keep yourself safe or push an advantage. As a self peel tool, it can create some space against someone who’s already in your face, reposition you, and stuns them. Because of the unstoppable you have during Blaze Kick, a well timed Blaze Kick
  can also avoid some stuns in a pinch. For pushing advantages, you can use the sure hit gap close to chase and lock down stragglers while having the option to land behind them after hitting the kick as long as you won’t die for doing so. Very high skill expression move. Get creative.
If there’s a farm or person very close to a wall, you can also use Blaze Kick  to vault over said wall off that target. A common applications are using the center Baltoy to Blaze Kick in or out of a jungle.
Blaze Kick  stun also comes with a small shove that goes opposite the direction you jump off after connecting with the move. While this normally isn’t too big a deal, you’d be surprised at how often you can leverage that to do something like pushing someone out of the safety of their goal zone. It’s also good knowledge to have for pushing Regieleki a bit further away from your goal or making sure you don’t accidentally kick it into your goal.
Feint  is a very usable alternative to Flame Charge where instances of damage are not avoidable by simple repositioning granted by Flame Charge, such as sure-hit or grabbing moves…think of Pika’s Electro Ball or Volt Tackle (and even his ult can be delayed with no target to trigger it), Glaceon’s Spears, Mew’s boosted basic or his own Electro Ball, Meowscarada’s Flower Trick, etc. It’s a situational pick but there are enough of those type of threats that exist that warrants being considered when they present themselves.
Moveset 2
Pyroball + Flame Charge
Despite the insane grouped burst damage of Pyro Ball  , it’s the inferior option to Blaze Kick because of the sheer utility of Blaze Kick that gives Cinderace that much more survivability and playmaking potential. Pyro Ball
  itself also has the flaws of having a very long startup animation that self roots Cinderace, which makes it so that you can’t safely throw out the move as often as you’d like to be able to.
Same general gameplan as the main moveset when it comes to Flame Charge. Pyro Ball  shouldn’t be thrown out on cooldown unless you’re really in a safe position and you’re confident you can land them all. Otherwise, save it for when people are grouped up for big value, finishing people off with a big burst, sniping stragglers outside your auto range, or as a last resort against a squishy diver to blow them up before they blow you up. Since you don’t have the self peel and reposition power of Blaze Kick here, adjust your limits and positioning accordingly. When you do throw out Pyro Ball, you pretty much have to hit cause otherwise you’re going to be losing out a ton of DPS from time you could’ve spent on continuing to auto.
Keeping track of your cinder stacks  is also important to be able to do with Pyro Ball, as you can make your already big burst damage even bigger if you get the Blaze proc with Pyro Ball.
Matchups
Favourable Matchup:
These are Pokémon that our team has determined CINDERACE is strong against. CINDERACE will generally be able to shut down these opponents playstyle's or have the advantage in a one on one fight.
Unfavourable Matchup:
These are Pokémon that our team has determined CINDERACE is weak against. These Pokémon will have the upper hand in a fight or be able to exploit CINDERACE's weaknesses.


 +6
+6
 +
+ /
/

















Share This Guide: