When it comes to playing Pokemon Unite, some of the most important decisions you can make happen long before you hit the arena. We’re not talking about which held items to pick, but something even more fundamental to your success: your control settings.
Unfortunately Pokemon Unite has a bunch of settings enabled by default when you create a new account that actually work against a player’s ability to control their Pokemon.
This can result in your chosen Pokemon acting as though it has mind of its own. Some of these settings include aggressive aim assist, an inability to intentionally target wild Pokemon and even a setting that causes your Pokemon to chase down opponents by default, regardless of how safe it is for you to be there.
Obviously, these settings leave a lot to be desired. Within any competitive MOBA, being able to precisely control your character is required to get the most out of your gameplay. More often than not the default settings will have you wrestling with the aim assist when you attempt to attack your opponent’s Greninja but lock-on to their Snorlax instead.

These system defaults really get in the way of your ability to play the game, but don’t worry because Unite Guide is here to tell you which settings to use.
Where are the settings in Pokemon Unite? How to Change your Settings.
The settings are located in a similar location on both the Mobile and Switch versions of the game, but the method of getting there is a little different. Below we’ll walk you through finding the settings for Pokémon Unite.
For the purposes of this article, we’ll be using screenshots from the Mobile Version.
Navigating to Unite Settings Menu – Nintendo Switch
On the Nintendo Switch getting to the settings menu is fairly straightforward. On the Home Screen, press the ZL button to bring up the Unite Menu. This is the menu that allows you to look at your trainer card, view your Pokemon, Held Items, etc.
Scroll down to the bottom of the menu, where you’ll see an option labelled Settings with a gear icon. Click on this to open the Settings Menu.

Navigating to Unite Settings Menu – Mobile
If you’re playing Unite on mobile, getting to the settings menu is almost identical to the process you’ll take with the Switch, but you don’t need to worry about button presses. Instead, on the home screen, tap your trainer portrait in the top left of the screen to open the Unite Menu.
From there, scroll down to the bottom and tap the Settings button with the gear icon to open the Unite Settings Menu.
Once you’re in the menu, navigate to each of the following tabs to tune your setup so you can get the best controls the game can offer.
System Settings – Recommended Settings
Not too much to say about the system settings menu, however it is worth noting that you should set the Frame Rate to high, which the Unite Menu also recommends. This should be set to high by default but it’s worth checking, since you’re there.
We’d also recommend setting your graphics quality to high if your device can handle it.
Also, this is where the Colorblind Support setting is located. If you’re colourblind or just having trouble differentiating the teams you may want to change this setting to “ON”. Anecdotally a fair number of gamers like using Colorblind mode whenever it’s available as it increases informational contrast and can help you keep track of what’s going on when fights get too cluttered.

Controls – Best Settings to Use
Our team has gone through every setting and tested them to determine which configuration gives you the most control over your Pokemon inside a game of Unite. After testing, we’ve determined the best control settings to give you an edge on Aeos Island.
Opponent Lock on Priority – Lowest Remaining HP (Value)
This determines where your basic attacks and where any targeted move’s aim snaps to. Lowest remaining HP value means your Pokemon will target the opponent with the lowest remaining health total, meaning the target closest to being KO’d.
The reason you’d opt for Lowest Remaining HP (Value) instead of Lowest Remaining HP (%) is because sometimes a Tank could be missing a higher percentage of their total health compared to a low health Duraludon and still have more health than your intended target. By choosing the Value option you’re making sure you’re not going to have your auto attacks diverted by Pokémon with larger health pools.

Attack Controls – Advanced Controls
This is a no brainer. This lets you actually be able to control when your basic attacks target wild Pokemon or opposing Pokemon. Your laning and objective play will be gutted without advanced controls. Honestly the Unite Guide team is absolutely flabbergasted that this is turned off by default.
When you have Advanced Controls enabled, you’ll use the “B” button to attack wild Pokemon when playing on Switch. On Mobile there will be a new button added to the screen beside the auto attack button that has a little white monster face inside of it.
Automatic Basic Attacks – OFF
Basic attacking in this game is easy; You just hold down/mash the button! Automatic basic attacks just reduces the amount of control you have on your character and can lead you to accidentally automatically attacking things when you don’t want to. This can result in you stealing your lane partners farm or finding yourself attacking enemies you’re trying to run from, slowing you down and possibly preventing your escape.

In-Motion Pursuit Mode – OFF
Turning this off should also disable the In-Motion Pursuit distance setting. This setting when it’s on basically makes the game try to make your character walk towards things against your will when you attack something, which can very easily get you killed.
Scoring Controls – Press Button
This could be considered a matter of preference, as “Hold Button Down” isn’t putting you at a big disadvantage, but “Press Button” is generally better for trying to mash in microdunks and avoiding mishaps where your finger slips off the score button. This is more a Quality of Life tweak but the game is won by scoring and this will help you land more scores.
Lock-on Icon (THE WHEEL)
Unfortunately, this is a setting that varies in usefulness depending on platform you play on. After testing we think it’s Optional for Switch but ON for Mobile version players.
Turning on lock-on icons adds a wheel featuring images of your opponents Pokemon to screen. When a Pokemon is in range their icon will light up enabling you to select them as your lock-on priority; ensuring your auto attacks and targeted move aim snaps to the chosen Pokemon for as long as they’re within range.
This targeting method is very helpful and has obvious applications for defending goals or picking targets, however when it comes to playing on the Nintendo Switch, the UI is very obstructive, clunky, and prone to accidental targeting selection. The right analog stick is used to cycle through the available targets on the wheel but the same stick is used for aiming skill shots or choosing other targets in the middle of a fight. Given that it’s just a little too easy to accidentally shift your locked-on target to someone you didn’t mean to aim for.

It’s technically optimal if you manage to master it, but use at your own risk and form your preference based on how often it ends up actually helping/hurting you. The UI for mobile is much less obstructive and easier to use, so it’s worth always having on if you’re playing on mobile.
Move Panel Sensitivity – As high as you can get it!
This only affects moves that aim with a circle reticle. Basically, things like Cramorant’s Dive and Hurricane. Gardevoir’s Psyshock, Future Sight, and Unite Move, Gengar’s Hex and Sludge Bomb, Hoopa’s Hyperspace Hole and Phantom Force, Leafeon’s Leaf Blade, Alolan Ninetales’ Avalanche, Espeon’s Psyshock, Talonflame’s Brave Bird, etc are affected by this setting since the circle reticle lets you control the exact point where you move lands on.
If you’re a Switch player, set this as high as you can handle and work towards maxing it out to recover from auto targeting mishaps more easily and just being able to aim as quickly as you can, cause otherwise aiming takes a painfully long time.
This setting does NOT affect the aiming of moves that are straight skillshots or dash moves such as Inteleon’s Snipe Shot and Fell Stinger, Lucario’s Power-Up Punch and Extreme Speed, Venusaur’s Solarbeam, Dragonite’s Dragon Dance, etc. The aiming of these skills are purely tied to the direction your stick is pointing, so sensitivity doesn’t matter here.

Camera Follows Moves – ON (Usually)
This mainly affects longer range moves like Solarbeam or Gardevoir’s Psychic. It’s handy to have on, but it does get a bit weird with Snipe Shot. Generally, pro players in Pokemon Unite will usually be manually panning the camera ahead when playing these types of characters anyway.
It’s kind of a crutch, but not bad to have around. If you don’t find it very helpful or are already good about panning your camera ahead manually, then you won’t lose much by turning it off.

Move Aim Follows Movement Direction – PREFERENCE*
*We lean towards ON for some characters.
This setting mainly affects moves that are straight dashes. These make the aim of these moves follow the direction of your movement/left stick, much like how Dodrio has to aim many of its moves with the movement stick.
The right stick/move aim stick still takes priority over it too, so it’s not like you’re always forced to use this even when it’s on.
This setting being on can make life a lot easier for a handful of characters that often find themselves having to rapidly aim different moves around in multiple directions. A great example of this being Flame Charge + Mystical Fire Delphox getting to use the left stick exclusively for Flame Charge direction to free up the right stick for just aiming Mystical Fire.
Feint Attack Zoroark is also a somewhat notable beneficiary from this since it can make doing hyper optimized Feint Attack cancel combos a bit easier to pull off.

Automatically Lock-On to Targets – OFF
Having this setting on means your move aim snaps to nearby targets. On paper this sounds good but it doesn’t mean that it’ll snap to the target you WANT hit. Just a nearby target. Turns out their smart assist is not so smart.
Why would you want your aim to automatically stick and track onto something you don’t intend to hit? It could maybe help some newer players but be a detriment in the long run.
Move Learning Controls – PREFERENCE *This is a Nintendo Switch Specific Setting*
Unite Guide leans towards using Button Combination to learn the moves.
By default it’s on single button where you just press left or right on the D-Pad to learn new moves. This is fast and relatively low hassle most of the time, but the D-Pads on first party Switch controllers aren’t the best and can be misclick prone. You don’t want to pick the wrong move when you’re attempting to ping recall, or even just select the wrong move in the heat of battle.
Button Combination requires you to hold down the L Button + X or Y to learn a move. This is safer, but may interfere with camera panning or hurt a bit for learning moves as fast as possible.
Aim Assist Settings – Assist OFF
Turn your aim assist off!
You will do much better in the long run learning how to actually aim your moves and target what you want instead of whatever the game thinks you want to target.
During coaching sessions I’ve seen people be repeatedly miss their intended target because this setting was on and snapping people’s aims to something else as they entered threat radius.
IMPORTANT NOTE: “Auto aiming” is the game trying to aim for you when you just tap the move button, while “auto targeting” mainly applies to the circle reticle moves mentioned in the “Move Panel Sensitivity” part where the aim of those moves starts on what the game thinks you should be targeting. These are unaffected by this setting.
Camera Sensitivity – As High as You can Manage
Like move panel sensitivity, this is going to come down to your comfort level. This allows you to set how quickly your camera moves around the map. Higher sensitivity means you’re able to see farther, faster. That said, you need to be able to absorb the information that your camera is passing by as you do it.
We’d recommend setting it at the highest level and if you find you’re missing things because it’s too fast, adjusting downwards until you find a sweet spot.
Being able to quickly pan over to other lanes to check player health, remaining points on pads or confirming that an enemy Pokemon is out of place is incredibly important for gathering the information required to make the correct plays with confidence.

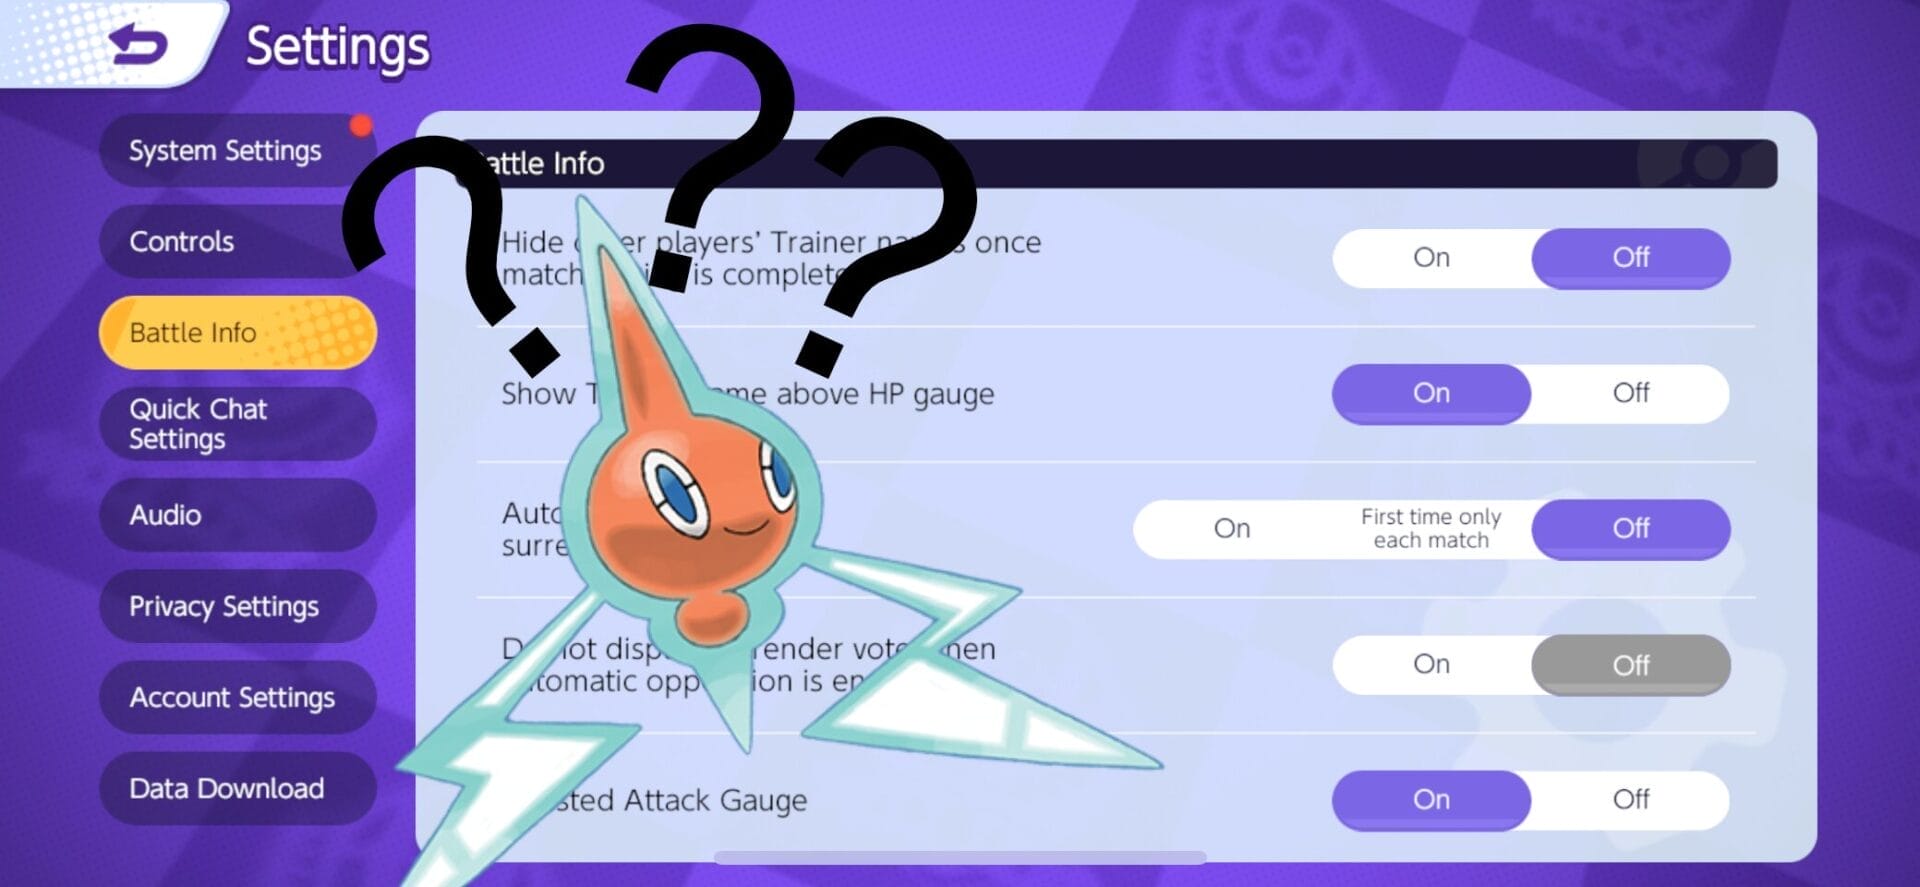
Battle Info Settings
Boosted Attack Gauge – ON
Many boosted autos are an important part of a character’s kit due to it adding to their damage profile and utility. Unfortunately, most characters also have no other visual indicator to show how close they are to a boosted auto attack.
The Boosted Attack Gauge is very helpful for making sure you can do scuffed bursts on farm, clutch stuns, etc. Players will want to have this setting on, no reason not to.
Show Cooldown Decimal Values – ON
You can never be too precise.
Display Message when Pokemon Level Up – ON
A Pokemon leveling up means that they may have just learned a new move or gotten an upgrade. Turning this setting on allows players to receive a notification when a Pokemon reaches their next level. The message isn’t very obstructive this information can make or break some fights. Have this set to on so you can avoid getting hit by a powerful new move that an opposing pokemon just learned. Especially helpful to monitor for those level 8/9 power spikes.

Hide Other Player’s Trainer Names once Matchmaking is Complete – PREFERENCE
Might be nice to have it on if you’re a streamer to make going too ham on a specific person harder, but is ultimately up to you. Some people don’t like seeing who exactly they’re fighting while others do.
Show Trainer name above HP Gauge – PREFERENCE
See above. If you’re a streamer it might be nice to hide other players names so you don’t get your chat piling on anyone in the chat but if you’re just playing solo it’s ultimately a preference choice.
Automatically Oppose Surrender Vote – PREFERENCE
Automatically voting NO does let you shrink the surrender prompt faster and on sight, which can sometimes be obstructive to vision, but it could lead to prolonging already done matches unintentionally. It’s up to you.
Do not Display Surrender Vote when Automatic Opposition is Enabled – ON/PREFERENCE
If you’re going to automatically vote NO to every surrender vote, you may as well not have to see the thing entirely. If you have the automatic surrender setting to “First time only each match”, you may want to keep this setting OFF in case you actually do want to surrender.
Button Settings Section
This is a section that allows Switch Players to modify their key bindings. We don’t actually have any recommended keybindings as this is very much about personal preference. Default controls are perfectly fine and good, but some people might like being able to change their buttons up. If you find yourself frustrated with the default layout feel free to poke around here. The customizations are a little limited but better than nothing.
Final Thoughts
Obviously, there’s a few preference based considerations when it comes to what settings to pick, but some of these settings are must haves when loading into a game of Unite.
Having the optimal settings in Pokémon Unite can give you a significant edge in the arena and allow you to have much finer control over your Pokémon. Once you take back control from the Unite system, you may have a bit of a learning curve while you adjust to having to be more intentional when you use your moves, you’ll quickly find that you’re able to make plays you wouldn’t have ever managed with the auto-pilot sill engaged.
As you continue to play and evolve with the game, don’t hesitate to revisit and adjust your settings. The perfect balance might change as you grow more adept at the game or as updates are released. Keep experimenting with different configurations to discover what works best for you, and we’ll keep an eye on the settings menu as well, just in case we find a new option that can help players get the most out of their Pokémon.

So tweak those settings and good luck in your matches!

