THE BEST ZOROARK BUILD GUIDE - POKEMON UNITE
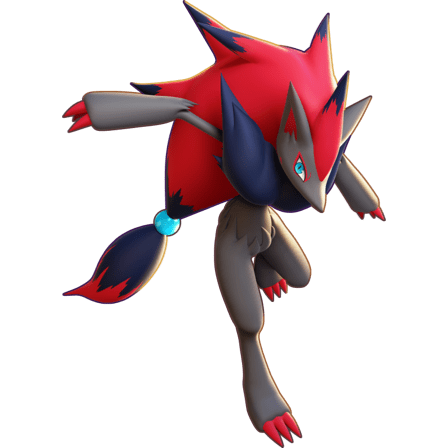
ZOROARK
Strengths and Weaknesses
Strengths:
+ Strong starting moves , can lane just as well as jungle.
+ Ridiculous level 5 spike that’s capable of snowballing earlygames and 2nd rotation jungle invading.
+ SUPREME mobility with both movesets, extremely quick and virtually unkiteable. Feint Attack’s finisher is also a good disengage.
+ Access to both CC with Shadow Claw and healing with Cut if desired. Feint Attack + Shadow Claw in particular offers almost airtight CC chain potential when executed properly.
+ Full combos do crazy amounts of damage and Zoroark itself also isn’t exactly easy to hit while doing them. The finishers are also very high burst damage with high execute bonuses.
+ Both FA and NS finishers deal % missing HP execute damage on top of just doing a lot of damage on its own, great for securing kills on both squishies and tanks.
+ Very low cooldowns. You have little to no downtime even if combo is dropped and generally good map presence from being able to spam your dashes while rotating. Feint Attack’s finisher is also a good disengage while Night Slash’s finisher has invincibility frames, giving yet another layer of safety on top of low cooldowns. .
+ Nightfall Daze is a very low cooldown Unite move that can be spammed and does obscene amounts of burst damage to people caught in it.
+ Illusion’s unstoppable frames and cleanse provide an extra layer of safety against CC.
Weaknesses:
– Squishy.
– Damage is very mitigated if combo is missed or interrupted.
– If not blowing someone up with Nightfall Daze , Zoroark’s TTK can be a bit slower than average depending on how good your execution is and the situation at hand.
– Missing a combo or getting it interrupted by CC can sometimes leave you in a really tough spot. Especially prevalent on Night Slash .
– Difficult execution makes Zoroark difficult to first pick up.
Build + Gameplay
ITEMS/EMBLEM BUILDS ARE THE SAME ON BOTH MOVESETS
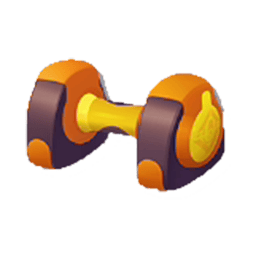
Items: Attack Weight , Weakness Policy , Energy Amp
– Since Zoroark’s total scaling on a whole combo is pretty high, Attack Weight has a lot of value here if you get your stacks going. Zoroark is also not at all bad at getting stacks from both a lane or jungle angle. Even if you don’t get stacks you’re still plenty functional and only need to consider going harder for them if Weight is going to be your only real damage item.
– Weakness Policy may sound counterintuitive on a squishy assassin but, Zoroark can often take a bunch of small hits while doing its combo to get good value out of this item. Especially during it’s first gank before you get any stacks, Weakness Policy gets pretty big value for upping your damage output.
– Energy Amp lets you use your low cooldown ult even more frequently while also raising its damage to staggering levels.
– There’s a variety of alternate item slot options on this character that you can replace one of these with. Float Stone greatly increases the overall speed at which you can get around the map, which opens up more roaming potential, positioning possibilities at lategame fights, and having a lot of rotation power during first gank timing. Aeos Cookie and Focus Band are great defensive items, although Aeos Cookie is a dead slot if you don’t get a ton of stacks.
Battle Item: Full Heal
– Pretty much the only real choice for Zoroark here. Full Heal provides an extremely important layer of defense against CC and things like Gravity and Imprison that helps make sure you finish your combos.
Emblems: 6 Brown 6 White – Flat Attack Focus
– Standard emblem build for physical attackers that aren’t constantly taking hits. Maximize that combo damage with some extra HP.
About Illusion :
You’ll have a separate button to activate this “passive” ability. At first glance, it just transforms you into a nearby enemy or wild Pokemon and the illusion stops when you score, attack, or take damage.
You’ll rarely be able to actually trick anyone with this, but it can sometimes lead to a moment of confusion or hesitation from the enemy team that can give you an opening. The main use for this part of Illusion is that if there’s a nearby enemy hiding in a bush, Zoroark may transform into said hidden enemy to basically let you know of their presence. Especially helpful in first gank situations where you’re waiting in a bush for a chance to strike.
The bigger use for activating Illusion is that while Zoroark is transforming, he has 20 frames of Unstoppable or about 1/3 of a second while cleansing any conditions on you. 20 frames is actually quite a bit of time in video games. If you’re practiced at it, you can consistently dodge some moves that have predictable timing while running around or during your combo. It’s also good to activate Illusion if you think you’re going to be in potential danger after ending your combo as an extra precaution.
Other Tips
- Keep in mind that Energy Amp is still giving you that big damage boost for a few more seconds after casting Nightfall Daze . One way to take advantage of this is having your combo’s finisher on deck as you ult, then use the finisher right after for a bonkers Amp boosted finisher.
- Illusion is one of the few things that can cancel Mean Look if done while the “eye” icon above your head is still closed.
- While roaming and rotating on Feint Attack, don’t be afraid to spam your dashes to get around the map even faster. They’re only on like a 4 second cooldown anyway.
Moveset 1 - Best
Feint Claw – Feint Attack + Shadow Claw (BEST)

General Gameplan :
Zoroark is an extremely mobile and high skill cap assassin that has a bonkers level 5 spike to snowball ganks with. It’s not at all uncommon for Zoroark to be able to wipe enemy lanes during its first gank, then take that momentum to a 2nd rotation enemy jungle invade where it has one of the best level 5-6 invades. Once you get a snowball going, you can pretty ignorantly romp through the first few minutes of the match before enemies get enough means to start keeping you in check.
Feint Claw excels at oppressing and dualing one or a few targets with high damage and CC chains while providing a lot of tricky movements for outplays. For the most part, this set is never the wrong answer for which Zoroark moveset to play if you’re not sure which set to play and you’re good on Feint Attack. But, it’s especially good against squishies.
Later into the game at the Rayquaza fight is where good Zoroark players start to really distinguish themselves from the average ones. Because of the nature of Zoroark’s combos having it cover a lot of space and sometimes having slower than average TTKs, lategame fights require Zoroark players to patiently wait and move around in a flanking position to find the perfect opportunity to single out their targets and/or safely get off their combos for big damage.
On top of having a good handle of Feint Attack’s mechanics, good usage of Full Heal , Illusion , and Nightfall Daze can also be very key in being successful. Nightfall Daze can be used for an especially quick kill on a squishy after dashing into them, as a secure option, or as a way to just nuke people that are grouped up or try to converge on you. The unstoppable on Nightfall Daze also can be leveraged for punishing CC and giving you long periods of unstoppable, especially when used in tandem with Full Heal before or after it.
While it can be difficult to play Zoroark lategame against teams that are properly peeling for each other, the payoff is well worth it and your very low cooldowns sometimes give you a big layer of safety in case you mess up.
Zoroark is also a very mechanically intensive character, especially compared to most other things in Unite. We’ll be going over Feint Attack’s mechanics in detail now.
Feint Attack Mechanics Explained :
Feint Claw Zoroark is a pretty mechanically intricate set and may seem a little overwhelming to new Zoroarks. Having good mechanics and understanding of how the move works is important to success, so read up!.
TL;DR: Feint Attack to start combo and set return points for dashing back and forth on your target and reset the cooldown of Shadow Claw. Shadow Claw to change targets or chase down people trying to escape and set the return point to a more forward position where you casted it. After 4 hits, use finisher to blow something up. If you don’t get that, keep reading for a more detailed explanation of the move’s mechanics.
Still confused or want a more detailed understanding? Keep reading:
– Feint Attack is a very long dash attack forward. If you hit something, it leaves a return point at where you started the move, resets the cooldown of your other move , and fills one part of a combo meter. The combo has begun and its active time will be shown by an orange bar counting its time down. Every hit of Feint Attack or your other move will fill your meter by one.
– If you click Feint Attack again while your combo is still active, you do another dashing attack back to the return point while making a new return point at where you used this it. Hitting someone with a Feint Attack recast also still resets the cooldown of Shadow Claw/Cut .
– You can freely aim and use your Shadow Claw/Cut during your combo window for another hit to fill the combo meter. When hitting this move during the combo, your Feint Attack’s return point will be changed to wherever you casted this move. This will help keep people trying to run away or repositioning in your combo.
– Once your combo meter is fully filled after 4 hits, your Feint Attack will turn into a sure hit finisher leap that does high burst damage with a big execute bonus. This leap controls a bit like Cinderace’s Blaze Kick , where you can control the direction you bounce off your target with the movement stick. While you bounce off your target, you also hit people standing in the way of that with the same big finisher damage.
– If you miss any of your moves during the combo or don’t hit something for too long, the combo will end, Feint Attack will go on cooldown, and your return point disappears.
Feint Attack Combos and Combat Basics:
With all that in mind, your typical combo for killing a single target while CC chaining them will be Feint Attack > Shadow Claw > Feint Attack > Shadow Claw > Feint Attack Finisher . Oftentimes before the first Feint Attack, you’ll often be able to start with a tipper Shadow Claw to knock them up and get a bit of extra damage at the beginning. Regardless, this is higher damage and faster than just fully mashing out Feint Attack . Using Shadow Claw during your combo is also a means of changing targets if you hit, since the knockup on said target and dash into them puts you in a position where you can do the rest of your combo on that new target.
Try to space yourself out in a way that will let you hit the tip of Shadow Claw to get a knockup every time you use it. Sounds difficult, but it’s easier than you think it is once you start getting a feel for it. If you can execute this quickly enough while hitting all your Shadow Claw tippers, you can basically true CC chain your target to death or close which is.. unfair. Even if you don’t perfectly tipper Shadow Claw, the non tip portion still has a .1 second stun that sounds tiny but can still be pretty disruptive.
You won’t always be doing that exact combo though. Because of how Shadow Claw resets your return point to the more forward position you used it in, you won’t be able to cover as much space with your Feint Attack recasts and potentially lose the option to use a Feint Attack recast as an escape option. While not weaving in Shadow Claw every time in your combo sacrifices a lot of the oppressive CC chain potential the set has, it’s good to know when not to use it so you can cover more space to hit more people or have a better escape plan. You’ll get a sense of when it’s good or bad to do this with time.
Feint Attack’s hitbox can also be deceptively generous, as you’ll still be getting a hit on people in a small area around your return point. You can still walk around normally while your combo is active too, which can sometimes help with slightly readjusting your positioning to help combo better. Helpful knowledge to keep in mind for pushing your combos.
The finisher hit of Feint Attack has a large 15% missing HP damage bonus and the bounce off distance is very good. This makes the finisher incredible at finishing off lower HP targets on top of already doing high damage on its own. The large bounce off distance from your finisher target also lets you be able to hit some more people with the finisher after bouncing off or be a great way to disengage after a combo.
When starting out, don’t be afraid to take some Ls from taking your time with combos and practicing it solo in practice mode. While you can definitely push the character much further with super quick and snappy combos, you’d be surprised at how much you can still get done being a bit slower as you get down the muscle memory and knowing when to use which move on the fly. The speed will come with time.
Advanced Feint Attack Techniques :
While these aren’t really necessary for doing well as long you pick your spots well, these may be helpful techniques for more experienced Zoroark players to have in their arsenals to optimize their combo game even more. Beginners shouldn’t to be in any rush to learn how to do these until they really start getting the hang of the character.
There’s some nice applications for this that can noticeably speed up your combo:
– Reactively making sure your combo still hits in case you mess up or on someone trying to dodge the Feint Attack. You can pretty much completely change directions or just extend your already long range Feint Attack dash by casting Shadow Claw during it.
– Your return point is also probably going to be closer to your target from casting Shadow Claw mid Feint Attack . This means that if you opt to recast Feint Attack for the 2nd hit, the shorter distance means a shorter dash, which means you can act again sooner for a faster combo overall.
– Since you get your Shadow Claw cooldown reset upon hitting Feint Attack at all, you can quickly cast Shadow Claw to go back into your target and hit them again right after the Feint Attack hits, letting you potentially do your combo and get your finisher way faster.
All in all, while these tricks aren’t usually needed to succeed, they can still be a very helpful tool in your arsenal for making sure you kill things faster or that your combo lands at all.
About Cut :
While Cut is technically the dev intended move to be played with Feint Attack due to being able to spam heals more often with it, it’s much worse than Shadow Claw in practice.
Cut’s healing output simply isn’t significant enough to outweigh flat out preventing enemies from even attacking with Shadow Claw’s CC. While it can occasionally make a difference in drawn out fights, you should be trying to avoid those on Feint Attack anyway and Zoroark also still has the means to avoid taking big hits. Why heal when you can simply just make it way harder or even impossible for your enemies to actually fight back and not get hit instead?
The knockup of Shadow Claw’s tipper is also a nice tool for comboing into Nightfall Daze .
Moveset 2
NS Zoro – Night Slash + Cut/Shadow Claw

While you still follow the general Zoroark gameplan of being a high mobility assassin diver that can snowball earlygame, Night Slash’s different way of dashing around, higher total damage potential, and the invincibility frames and healing of the finisher hit makes it better suited to taking on very bulky enemy comps. Although the CC that frequents the bulkier comps you pick this set against is more likely to prematurely end your combo on this moveset, the more flexible overall movement of Night Slash also gives you much better means of being evasive to dodge it entirely.
On the downside, it’s not as good as Feint Attack for quickly beating down 1-2 individuals at time due to Feint’s movement style being better for that goal. Feint Attack combos also generally don’t take as long to finish and have much more room for speed optimization than Night Slash combos.
With Night Slash , the movement more about dashing around from target to target to build this move’s combo meter and do damage in a similar nature to something like Lucario’s Extreme Speed set. You don’t even have to hit the dash portion of Night Slash to maintain your combo as long as you hit the auto attack portion right after the dash, which gives you the option to dance around danger while still getting your hits in. At the big fight, you’re overall trying to be a slippery little guy dashing around and through the fight while having the option to nuke something with Nightfall Daze .
Night Slash Mechanics Explained :
While many players will find the movement style of Night Slash to be easier to understand, the controls of this move are very unconventional and it’s very punishing to mess up your combos on. It’s pretty much required that you get familiar with them in practice mode before hopping into a real match with it. Here goes!
When you first cast Night Slash , it’s think of it as a 2 second long special buff or stance change that puts you in a special mode for this move with its own unique controls, properties, and being able to fill your combo meter. For the ease of explaination, I’ll be calling it “Night Slash Mode” in this part of the Night Slash section of the guide.
TL;DR: Normal movements will change to dashing attacks that you can do special autos at the end of that let you continue your combo. Your other move can be used during this mode to be another way to maintain your combo or extend the distance of your finisher that comes after 6 hits.
Still confused or want a more detailed understanding? Keep reading:
– Any direction you tap with your movement stick once in this state will be turned into a dashing attack that fills one part of your combo meter on hit. If you don’t want to use that dashing attack for a moment, don’t touch your movement stick so you don’t do one.
– This means that you CANNOT walk around normally while Night Slash Mode is active because all your movements will turn into the dash attack.
– In order to refresh the duration of your current Night Slash Mode and be able to get your whole combo off, you have to hit the special boosted auto that you get after Night Slash Mode dashing. Each hit of these autos fills one part of your combo meter and you can use it regardless of whether or not you actually hit the dash portion.
– Shadow Claw or Cut can still be casted on their normal cooldowns during Night Slash Mode. This can be helpful for readjusting your positioning without committing to a Night Slash Mode dash or gaining the benefits of those moves on hit mid combo to help you out while still filling the combo meter by 1 and being the only other way to refresh the duration of Night Slash Mode.
– You don’t get a new special boosted auto out of Shadow Claw/Cut though, so you have to be prepared to do a Night Slash Mode dash > auto right after if you already used your previous special boosted auto to make sure your Night Slash Mode doesn’t expire.
– After getting the 6th and final hit needed to completely fill the combo meter, you immediately leap into the air to do your insanely flashy Night Slash finisher . You are invincible while still in the air before you come down with the big final blow that comes with some extra healing.
– You can cast Shadow Claw/Cut while in the air during your finisher attack for an extra burst of movement towards your direction of choice to help with catching people trying to fun away or being able to travel over basically any wall in the game.
– If you miss your Night Slash Mode dash + auto, the combo can still be salvaged if you’re quick and Shadow Claw/Cut are off cooldown. Just hit something with Shadow Claw/Cut and your Night Slash duration will get reset and you’ll be able to do the Night Slash Mode dashes and autos again.
– Nightfall Daze and Illusion can still be used during Night Slash Mode
Night Slash Combos and Combat Basics :
Having a good sense of spacing and discipline on the movement stick is important for making sure your Night Slash dashes and autos move and hit the way you want them to. Since landing both the dash and auto fills 2 parts of the combo meter, the fastest way to reach the finisher after the 6th hits is to hit the dash + auto three times.
As a general rule of thumb for cleaner execution, you should let go of your movement stick after Night Slash dashing until you’re ready to Night Slash dash again and tap a direction. This also keeps you safe from jumbling up your Shadow Claw/Cut input from holding a direction on the movement stick too much.
It won’t always be that easy though, as sometimes you won’t be wanting to not hit the dash so you can dance around danger better. You can still leverage the good range on the post Night Slash dash auto or landing Shadow Claw/Cut to still get a hit in on a nearby target and maintain your combo despite not hitting anything with the Night Slash dash.
As stated earlier, greater target flexibility and freedom of movement on Night Slash means that you should be taking advantage of this to play an evasive game while still pumping out damage. This style of movement also means that this moveset is also better at playing from non flank angles and diving through frontliners to reach the squishies in the back, although it’s not always advised to do this.
The invincibility of the finisher hit lets you avoid a even more damage with fortunate and/or strategic timing. You can also utilize the finisher defensively if escaping is a priority instead, as you can easily travel over any wall while in the air by casting your other move during it to boost its movement. The finisher also has a strong 10% missing HP damage bonus, which makes it great for finishing weakened enemies as well.
Because of the short duration of Night Slash Mode, getting hit by any significant length stuns will likely spell the end of your combo. Good Full Heal usage is key. Nightfall Daze during or after your combo for the unstoppable and huge AoE damage is also great for punishing CC, deleting key targets, and/or punishing people grouped up too hard.
Another measure against CC you can take is if you rip Nightfall Daze when at least two bars of the combo meter are filled, activate Full Heal after the unstoppable from Nightfall Daze ends, then quickly finish your combo (usually 2x Night Slash dashes > autos) while your Full Heal is active to get the i-frames of the finisher. This should give you a very long period almost completely or completely uninterrupted period of unstoppable into invincibility where you can’t be CC’d depending at what point in the combo you used Nightfall Daze.
One of the best combos for applying this idea is whiff Night Slash dash > Shadow Claw/Cut > Nightfall Daze > Full Heal > Night Slash auto > 2x Night Slash Dash + auto > finisher. If executed correctly, this can be complete immunity to CC from when you Nightfall Daze to when you end your finisher.
Shadow Claw vs. Cut with Night Slash:
Shadow Claw completely blows Cut out of the water with Feint Attack and still has great use with Night Slash due to the CC helping you land your combos or setup for Nightfall Daze more easily.
However, Cut isn’t gapped nearly as hard with Night Slash since Night Slash’s lack of CD resets for Shadow Claw means there’s no crazy chain CC potential to be losing out on. The extra bit of healing can be nice to have on hand for the matchups Night Slash is preferred in and as a supplement to Night Slash’s finisher healing.
Another thing to keep in mind with Cut in this Eevee infested meta is that unlike Shadow Claw, Cut doesn’t have any CC that can activate the passives of Espeon , Glaceon , and Umbreon . This is a double edge blade though. While it may make it easier for you to kill those guys alone since you won’t have to worry about activating their passives, it also means you won’t be able to activate their passives and get them on cooldown for your teammates to work with. If you have red buff on for the slow on autos, you’ll also be activating them anyway off a Night Slash auto.
Matchups
Favourable Matchup:
These are Pokémon that our team has determined ZOROARK is strong against. ZOROARK will generally be able to shut down these opponents playstyle's or have the advantage in a one on one fight.
Unfavourable Matchup:
These are Pokémon that our team has determined ZOROARK is weak against. These Pokémon will have the upper hand in a fight or be able to exploit ZOROARK's weaknesses.
Countered By:


 +6
+6










Share This Guide: